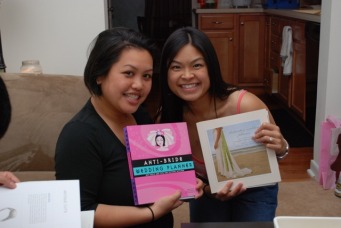
The BFF and I are having 2 totally different types of weddings. Hers will be held in our hometown, in a church, and has a huge guest list, while mine is out of the country, on a beach, and a third the size of her guest list. Since the BFF and I are going through the wedding process together and most of my planning is already done (except the little things), I have offered to help and concentrate more on her "details" which of course I don't mind at all, being that I would do anything for her and it's like I have 2 different weddings! It's double the fun for me!
Work in progress...
- Hand stamped thank you cards (DONE)
- Tissue pomanders (DONE)
- Watches (DONE)
- 3-tier Card box (DONE)
- Favor bags (DONE)
- Table numbers (DONE)
- Escort cards (DONE)
- Surprise project!!! (DONE)
- Candy buffet signage (DONE)
Hand stamped thank-you cards...
I'm so proud of the work my BFF did on her thank you cards that I just had to post them because they are so beautiful! I just have to say that I didn't help her with this project at all, she did this on her own, just with the help of my tools. She looked so happy and had such a great time that I didn't want to take that away from her!
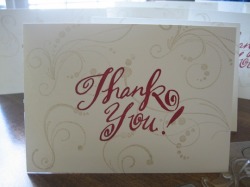
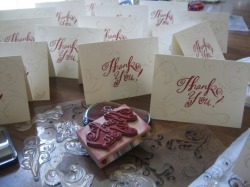
She bought blank card packs (20 cards per pack) from Michael's for $2.89 (with a 40% off coupon). The "thank you" stamp was also purchased at Michael's (roughly $7 w/out a coupon) and the flourish stamps I already had in my scrapbook supplies. With a little creativity and little money something beautiful was produced!
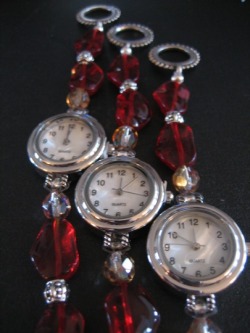
Watches for special attendants...
The BFF wanted something personal and unique to give as gifts for certain attendants of the bridal party. She later decided that that gift would be watches, watches that she asked me to make. We went shopping at our local craft store and bought the necessary materials, the beads and accents she liked, and then I was hard at work. Here's how they turned out. I only made 3, but she needs about 8, but the craft store only had 3 watch faces so we'll be heading back to the store to restock. But in the meantime, here they are:


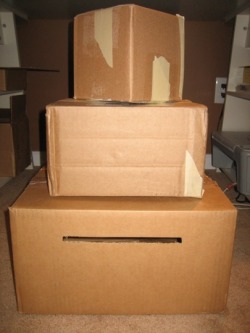
Cardbox
The inspiration for this project came from Etsy. Though it took all afternoon, I'm really proud of the outcome. I won't lie, it was frustrating at times, trying to line up the seams, using fabric adhesive, and then running out of gem stickers!
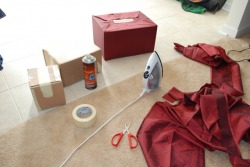
I was super excited to take on this project because I'm always up for a challenge. And keeping cost down is always part of that challenge. Well let me just tell you, I succeeded! This project was practically FREE!! The items used for this project:
I was super excited to take on this project because I'm always up for a challenge. And keeping cost down is always part of that challenge. Well let me just tell you, I succeeded! This project was practically FREE!! The items used for this project:
- Empty boxes (from work)
- Wine colored fabric (excess fabric from our bridesmaids' dresses)
- Fabric adhesive (borrowed from a friend)
- Ribbon (excess from previous wedding projects)
- Gem stickers (from my scrapbook supplies)
BEFORE...
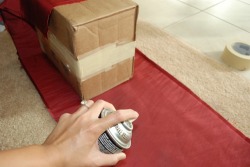
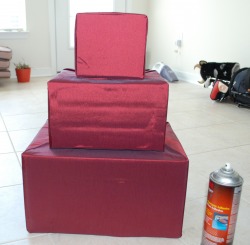
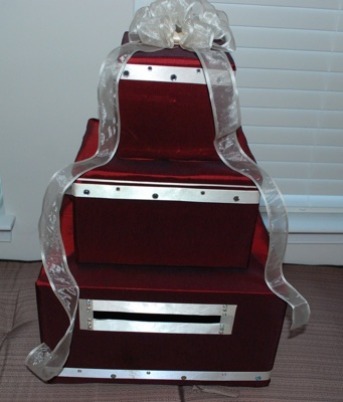
So the fabric is adhered to the boxes, next I attach the ribbon using double sided tape. I initially tried using the adhesive spray but the spray marks showed through the other side, it annoyed me so I started over and the double sided tape worked and looked better. The ribbon toppper is a wired sheer ribbon that's attached by a clear twist tie. Lastly, I added the self-adhesive gems randomly. So there you have it, a MONEY CARDBOX made at no extra cost!
AFTER...
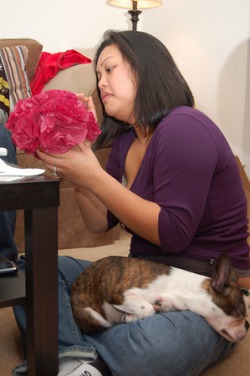
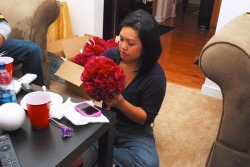
Tissue Pomanders
The BFF and her fiance decided that they'd like to decorate their ceremony using these tissue pomanders. We would need to make 30, 1 on every other pew and 15 on each side of the church. Sounds a lot huh?! So to help get started, I came across this tutorial from my favorite site, Wedding Bee of course! We then ordered the tissue paper and ribbon from Paper Mart and she later purchased the styrofoam and wire from our local craft store (of course using a coupon)!
This has been an ongoing project! I knew this was gonna take some time, so I slowly started working on it. After she purchased the styrofoam balls and the wire, I went down to business. On nights that I would catch up on the DVR, I would start twisting wire that would be needed for the project, mindless work really. And on a day her and I got together, a day we call wedding craft day, I hot glued wire into the balls so that the ribbon would stay in place.
This has been an ongoing project! I knew this was gonna take some time, so I slowly started working on it. After she purchased the styrofoam balls and the wire, I went down to business. On nights that I would catch up on the DVR, I would start twisting wire that would be needed for the project, mindless work really. And on a day her and I got together, a day we call wedding craft day, I hot glued wire into the balls so that the ribbon would stay in place.

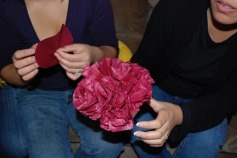
Friends recently got together for my fiance's birthday, so we recruited their help in making some of these lovely pomanders. We only made 8, but that's better than nothing. Now we only have 22 more to go!! The pomanders don't take too long to make when you have the help of so many friends! So when taking on a project of this magnitude, I suggest getting all the help you can get! Luckily we're blessed to have great friends! Check out my blog spot to see more fun pictures!
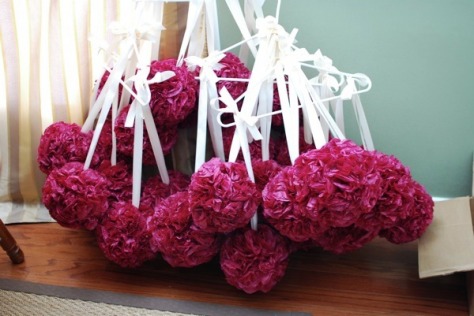
The FINAL PRODUCT!! ALL 30 of them...
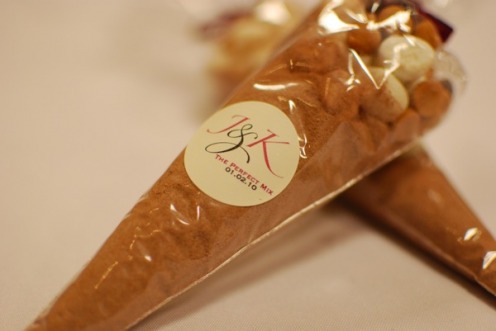
Wedding Shower Favors...A Perfect Mix!
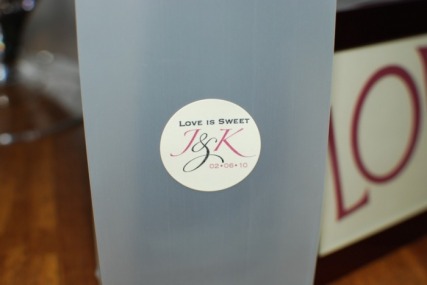
This past weekend we celebrated BFF's wedding shower. Her maid of honor, mother, and her future mother in law threw the party for the happy couple!! The hostesses, especially Jodi (MOH), did a fantastic job! I just wanted to share the special project she worked so hard on, the favors! It was a mixture of hot chocolate mix, marshmallows, butterscotch chips, and chocolate chips. A perfect favor for a cold day!!
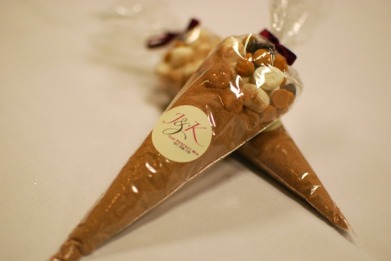
Here's a closeup. The labels were purchased from Labelsbythesheet.com and the monogram was designed by Anne K. Rodriquez. I just added the date and "The Perfect Mix" to the label.
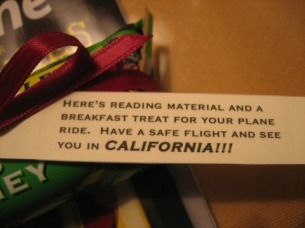
Just a little something for the long trip...
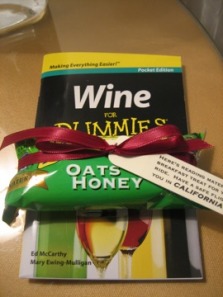
To get the bachelorette trip started I made these simple things a couple of nights before leaving!! I got so excited when I found these "WINE for Dunmmies" book at Target in the Dollar section that I got the idea to do this...
The girls were given this right after checking in our flights (a 6 AM FLIGHT!!)! Luckily we were all leaving at the same time!
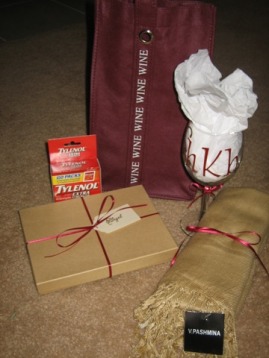
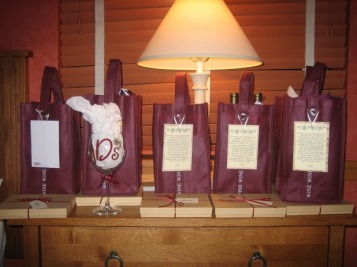
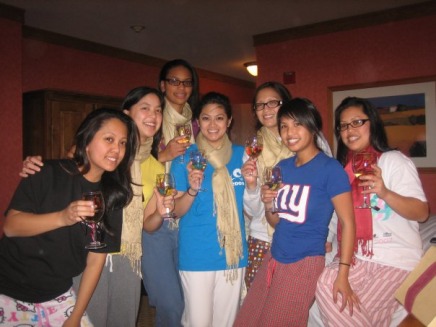
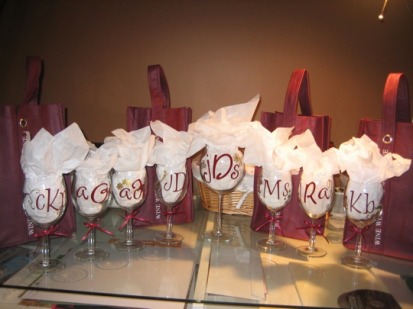
Bachelorette goodie bags:
I got the inspiration to make goodie bags for all the girls attending BFF's bachelorette party from where else...WEDDING BEE!! I kept this my surprise project so I've been waiting to post this for a while now! I'm surprised that I didn't spill the beans before the actual bach. party. In the bags, I included travel size Tylenol from the Dollar store, hand made wine charms, hand made monogram wine glasses, champagne colored pashminas (the bride had a maroon one), and matching T-shirts! All were stuffed into a maroon 2-wine bottle bag! The girls were so excited to receive the bags and I got all gitty by their reactions!
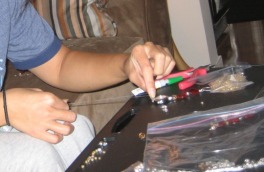
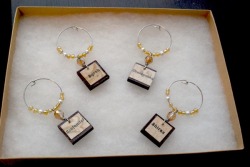
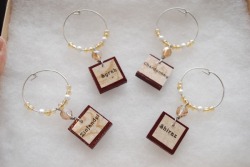
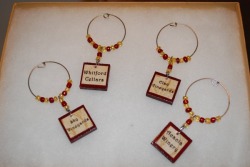
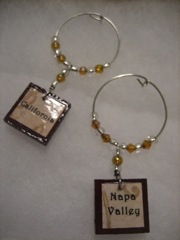
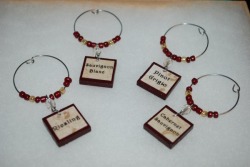
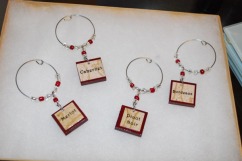
Wine Charms:
Supplies needed:
-20 gauge jewelry wire
-jewelry pliers & cutters-bead assortment
-wooden squares tiles (ex. Scrabble tiles) or anything similar
-paint (your choice in color)
-mod podge
-exterior varnish
-scrapbook paper
-clear address labels
-drill
1. First paint the tiles (2 coats) then let them dry overnight.
-20 gauge jewelry wire
-jewelry pliers & cutters-bead assortment
-wooden squares tiles (ex. Scrabble tiles) or anything similar
-paint (your choice in color)
-mod podge
-exterior varnish
-scrapbook paper
-clear address labels
-drill
1. First paint the tiles (2 coats) then let them dry overnight.
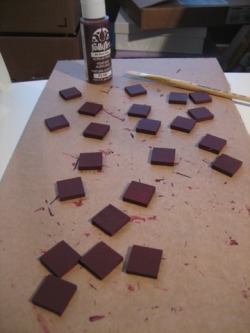
2. While that is drying, cut scrapbook paper to place on the tile (a smaller square than the size of the tile itself).
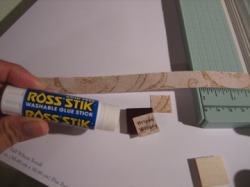
3. I used Avery clear address labels and printed wine categories on the labels (9-11 font sizes depending on the type of font chosen). After printing and cutting the label, place it on the cut paper and add it to the painted tile using a glue stick.
3. I used Avery clear address labels and printed wine categories on the labels (9-11 font sizes depending on the type of font chosen). After printing and cutting the label, place it on the cut paper and add it to the painted tile using a glue stick.
4. Afterwards, carefully brush mod podge on the whole tile. This helps the words from smearing and also keeps the paper in place. After that dries, (I waited overnight), brush the exterior varnish on all sides of the tile, this makes the wine charm waterproof (I used 2 coats).
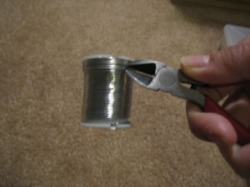
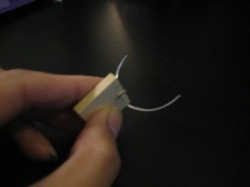
5. Cut jewelry wire in the size of the ring you want (I used the natural circle of the wire roll so I wouldn’t have to form a circle-one less step). Then curl one end of the circle for the closure.
5. Cut jewelry wire in the size of the ring you want (I used the natural circle of the wire roll so I wouldn’t have to form a circle-one less step). Then curl one end of the circle for the closure.
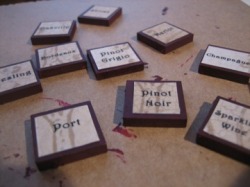
6. Once all the drying is done, drill a small hole into the top of each tile. Then cut jewelry wire and insert through the hole and twist the wire, add a bead and close the other end to make the charm.


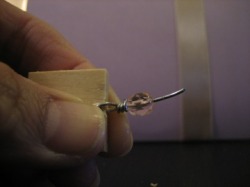
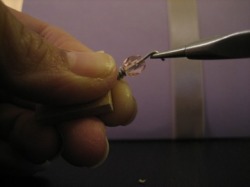
7. Use an assortment of beads in what ever pattern, sliding the beads onto the wire. Don’t forget to add the tile charm. Once all beds are in place to, finish by bending the wire 90 degrees so that it closes into the curled end of the wire.


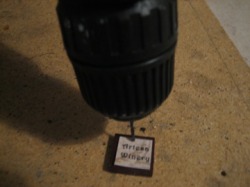
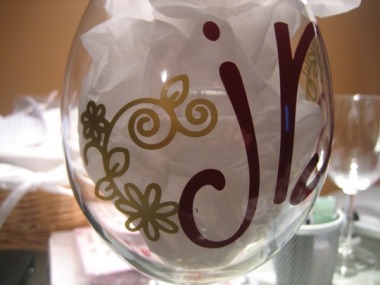
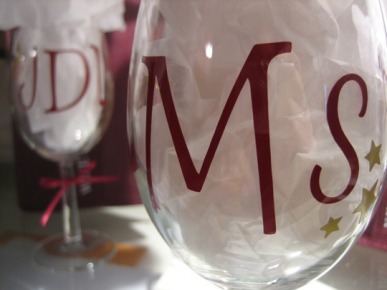
Wine Glasses:
I made these using my Cricut, 12x12 vinyl sheets, and wine glasses from Ikea. I practiced cutting the patterns and letters on regular paper before cutting on the vinyl, so I wouldn't waste the sheets.
CRICUT OWNERS: The Cricut cartridges I used were Home Accents, Lyrical Letters, and Opposites Attract. Use 3 on the blade, 3 on the speed, and 3 on the pressure. The sizes of the patterns varied between 1-3. The letters sizes were mostly 2 (or 2 1/2 for the middle initial).
CRICUT OWNERS: The Cricut cartridges I used were Home Accents, Lyrical Letters, and Opposites Attract. Use 3 on the blade, 3 on the speed, and 3 on the pressure. The sizes of the patterns varied between 1-3. The letters sizes were mostly 2 (or 2 1/2 for the middle initial).
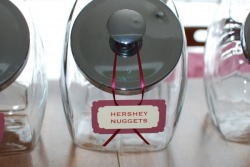
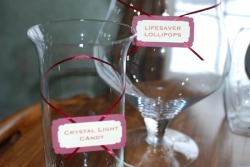
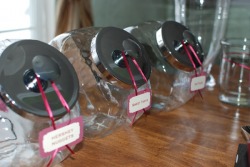
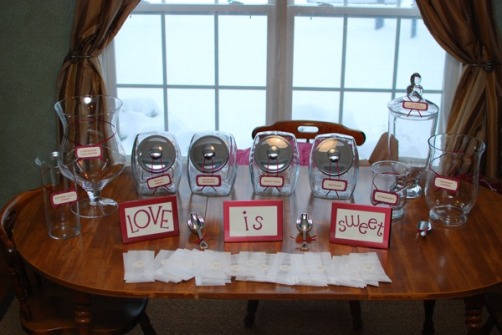
Candy Buffet:
BFF and her fiance wanted a candy buffet at their reception as part of the guests' wedding favor. Her initial thought was just to throw the jars and vases on the table and call it a day. I quickly said "NO, add labels because what if someone is allergeric to something (ie. nuts), accidentally eat it and then go into shock because of a bad allergic reaction, then your day is ruined!" Okay I know a little dramatic, but I'm all about details so I offered to lend a helping hand.
All I did was print the name of the candy on Avery Address Labels.
These address labels are a must have if your a crafter! I use them for a lot of DIY projects.
Then I placed the sticker on ivory cardstock, used a Creative Memories corner cutter, wrapped the vase in ribbon and then matted the label on wine cardstock (using the same corner cutter).
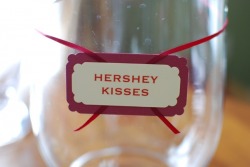
After I finished labeling the vases, I started with the table signage. MoH already had red frames that were used for the bridal shower so I borrowed them to use for the candy buffet. I used my Cricut to cut the "LOVE IS SWEET" letters, using the Alphalicious cartridge.
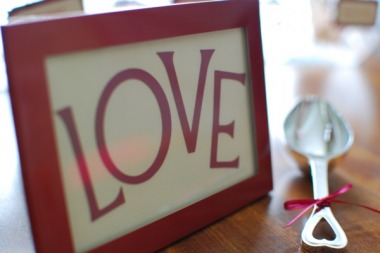
I bought wax bags from Paper Mart (I highly recommend this site for party essentials) and round labels from Labels by the Sheet.
So without having to do so much work, the candy buffet table will look fabulous, no one will go into shock, the bride will be happy, and the detail pictures will be gorgeous!!
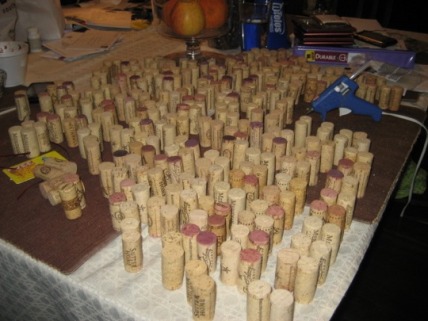
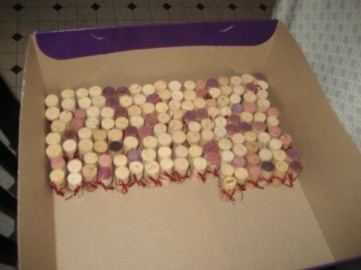
Wine Cork Escort Cards:
BFF and I worked on these in one evening, well sorta. I hot glued all the corks (she's prone to burning herself with hot tools) and she did the ribbon tying (shes still working on that part). This project was a great team effort, its surprising how much can get done with more people doing the job! Besides, the project was very therapeutic, not to mention great BFF bonding time!
The corks were collected over the course of her engagement. Some were collected from winery visits and the rest were from my sister, one of the many perks of having a bartender in the family!
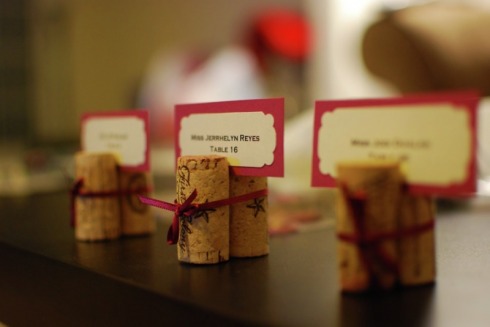
To do this project all you need to do is hotglue 2 corks together (in the center) and tie a thin ribbon to accent it! I have to mention that the initial inspiration was to dremel a cork and place it on its side, make a slit on top and place the escort card in the slit. But the BFF said dremeling was too messy, especially during the winter months...it is way too cold to be outside). So this is solutions she came up with, pretty huh?
The corks were collected over the course of her engagement. Some were collected from winery visits and the rest were from my sister, one of the many perks of having a bartender in the family!
To do this project all you need to do is hotglue 2 corks together (in the center) and tie a thin ribbon to accent it! I have to mention that the initial inspiration was to dremel a cork and place it on its side, make a slit on top and place the escort card in the slit. But the BFF said dremeling was too messy, especially during the winter months...it is way too cold to be outside). So this is solutions she came up with, pretty huh?

The picture shows what the final outcome should look like (just don't mind that it's a Bath & Body coupon). But you get the idea!
END RESULT with the escort cards....
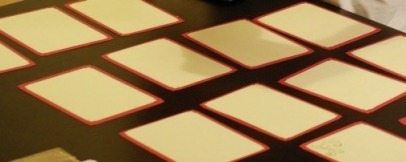
Escort cards:
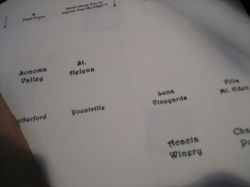
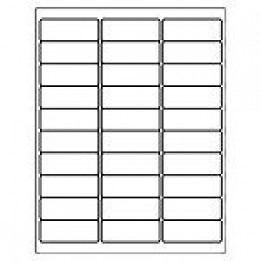
This project was a collaboration of BFF (& her Fi) and myself. We made a trip to Michael's and purchased 8x11 ivory cardstock ($2.50 for a pack of 50) and wine 12x12 cardstock ($0.67 per sheet). I told BFF to use the AVERY address template for typing and printing the escort cards. Using that template made life easier when it came to typing in the names and cutting the cards.
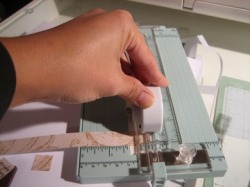
After printing, all you need to do is cut. Use a paper cutter and your good to go! See how the escort cards would be cut in columns and rows, there's no need to measure, because it's basically already done for you using the template.
After printing, all you need to do is cut. Use a paper cutter and your good to go! See how the escort cards would be cut in columns and rows, there's no need to measure, because it's basically already done for you using the template.
Once each name is individually cut, use a corner cutter on all four sides to dress it up a little, then mount it on the wine colored cardstock and cut. VIOLA, done! It takes some time (especially doing 250!) but it had to be done, no matter how late we stayed up!
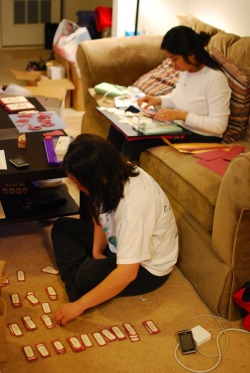
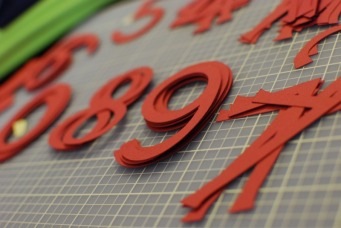
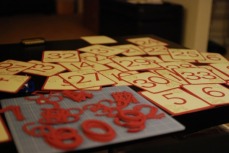
Table numbers:
For those CRICUT owners, this one's for you!! I used my Cricut to create the table numbers, all 45 of them!! So the wonderful machine worked its magic, though I must say it was a bit frustrating, because the mat kept getting off track. But after resetting and troubleshooting, it was quickly fixed, thank God!!
I used the Alphalicious cartridge and programmed the cuts in size 3 and used auto fill so I wouldn't waste paper. While the Cricut was at work, I was cutting the frames for the numbers. I just cut 8x11 ivory cardstock in 4 and used my fancy corner cutter. Afterwards, I mounted the ivory paper on the wine cardstock and used the same fancy corner cutter.
I used the Alphalicious cartridge and programmed the cuts in size 3 and used auto fill so I wouldn't waste paper. While the Cricut was at work, I was cutting the frames for the numbers. I just cut 8x11 ivory cardstock in 4 and used my fancy corner cutter. Afterwards, I mounted the ivory paper on the wine cardstock and used the same fancy corner cutter.
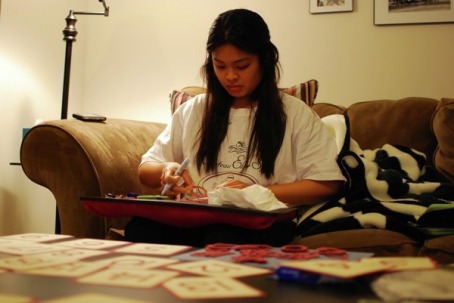
To dress up these table numbers even more, I stamped it up!! (PLEASE excuse my look...eekkksss, bad picture, but in the name of crafting, I'll post it!)
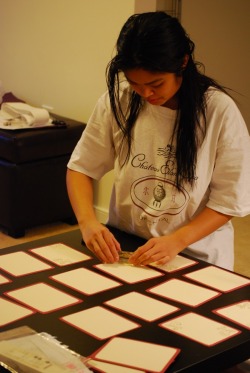
After the stamp dried, I was hard at work again. I used a glue pen to attach the numbers to the paper frames I made.
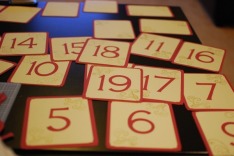
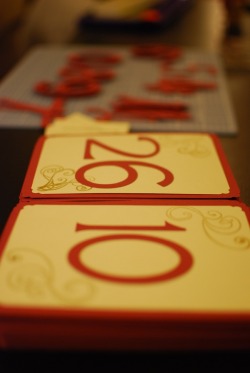
Notice the BFF's wedding date...hehe, my fiance was trying to be creative! Too cute!
